Hit Enter to Search or X to close
Install the CMP CookieYes with Google Consent mode enabled
With the GDPR, the law 25 in Quebec and many other regulations which are being introduced around the world aiming at protecting personal information, it is now important that you ask your users for their consent before collecting data from them.
The good news is that there are tools and solutions to help you. One of them is Google’s consent mode, ideal for Google Analytics.
In order to get user consent, you obviously need to use and implement a custom solution (a cookie banner) or pay for a CMP (“Consent Management Platform”).
In this article, we’ll talk about CMPs and will specifically focus on one of them, CookieYes.
A Consent Management Platform offers a complete solution to ask consent from users, allow them to manage their choices and control the use of cookies and tags. Of course, what you get depends on the CMP you choose, some offer more features than others.
This is therefore going much further than simple cookie banners. And those solutions are instrumental in order to comply with challenging regulations such as GDPR.
Google developed partnerships with some vendors, but many more exist.
Let’s mention two examples:
- Axeptio - this is a paid CMP, but it provides a full service which can even include assistance as well as high levels of customization
- CookieYes - the CMP is also very popular and offers a free plan for small websites (under 25 K pageviews / month) which can be enough in many situations.
If you want to enable Google's consent mode for Google Analytics and Google Ads, among others, make sure that the CMP (Consent Management Platform) you are interested in supports it by default. This is the case for the vast majority of those solutions.
CMPs that provide this feature usually offer a dedicated implementation for it, especially with Google Tag Manager.
We will now see how to proceed with CookieYes.
As mentioned earlier, CookieYes is one of the most popular CMPs at the moment, mainly because the solution is free for small sites and is easy to set up.
Let's take a look at how to add CookieYes to your website. Let's go through the steps together.
Create an account and add a website
First, go to the CookieYes website and create an account. If you are not interested in the paid plan (you can see the different packages here), create your account without using the free trial (CookieYes otherwise offers a 14-day free trial).
When you create your account, CookieYes will ask you to specify a website. You can add more sites in your control center later. At the end of the process, CookieYes will have created an installation tag for your site. You just need to add it to your site. We will see how to proceed with Google Tag Manager (GTM).
Install CookieYes with Google Tag Manager
The advantage of using GTM is that it's very simple. It allows you to add the banner and Google's consent mode, and you can effectively test if it works well, as well as precisely control how each banner will behave depending on users’ choices.
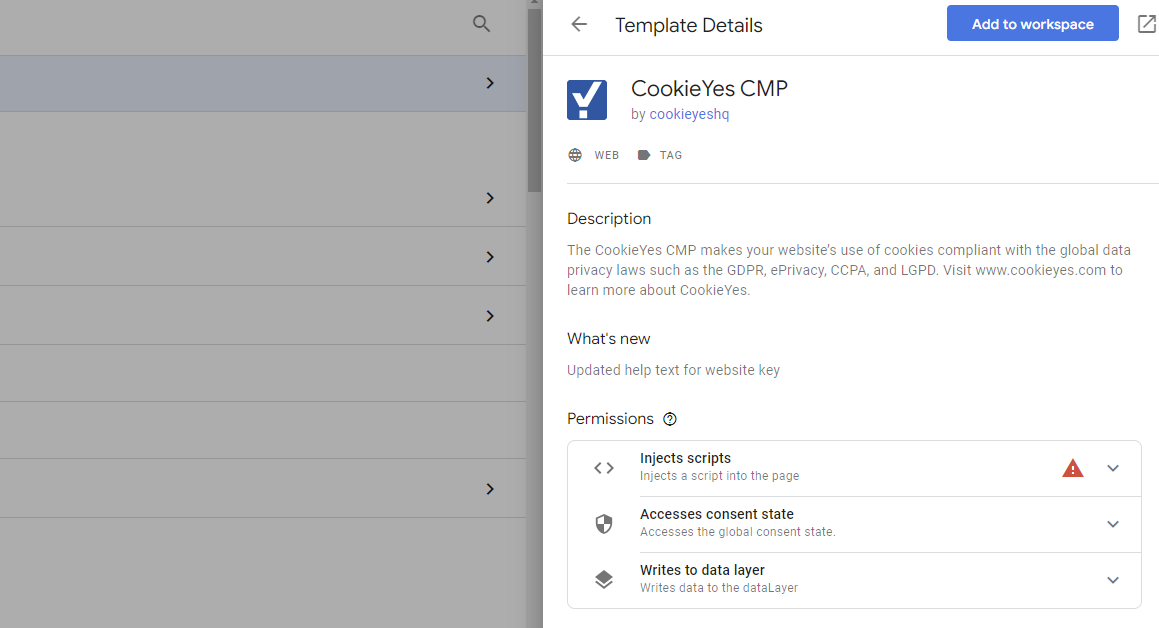
The next step is to go to your GTM container that is installed on your website. Go to the "Tags" section, then click on "New" to create one. Name it "CookieYes," for example. Then click on "Tag Configuration", then on "Discover more tag types in the Community Template Gallery". Search for "cookieyes" and select the template called "CookieYes CMP." Finally, click on "Add to workspace" and accept what’s said in the prompt that shows.
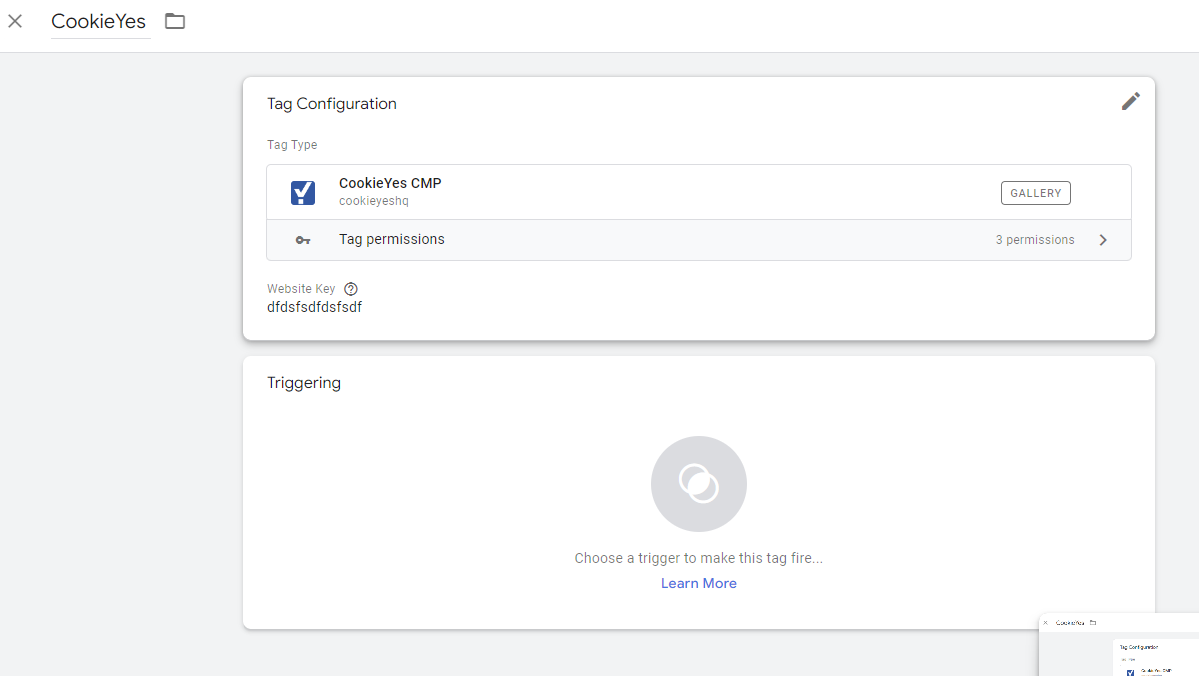
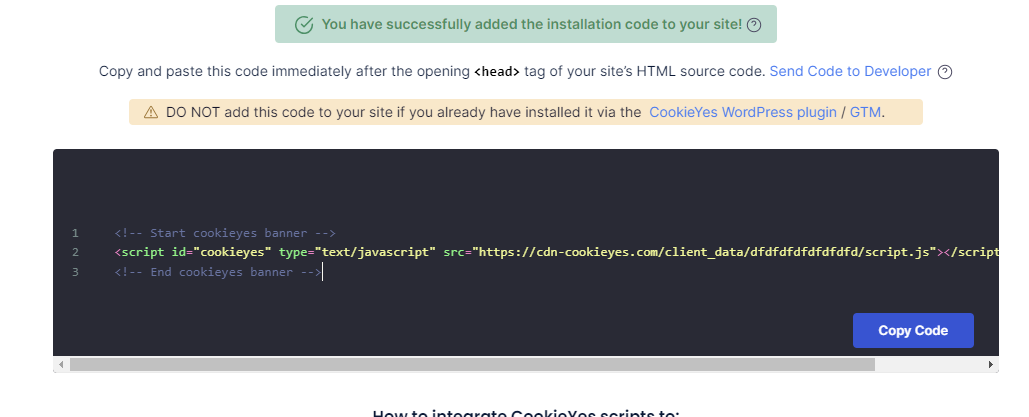
Once that is done, you need to add your website's key in the tag "Website key" section. This key can be found in the installation tag provided by CookieYes (you can find it in the Advanced Settings section of your control center if needed). Copy the part between “/client_data/” and “/script.js” in the “src” attribute of the code. In the example above, it is “dfdfdfdfdfdfdfd”.
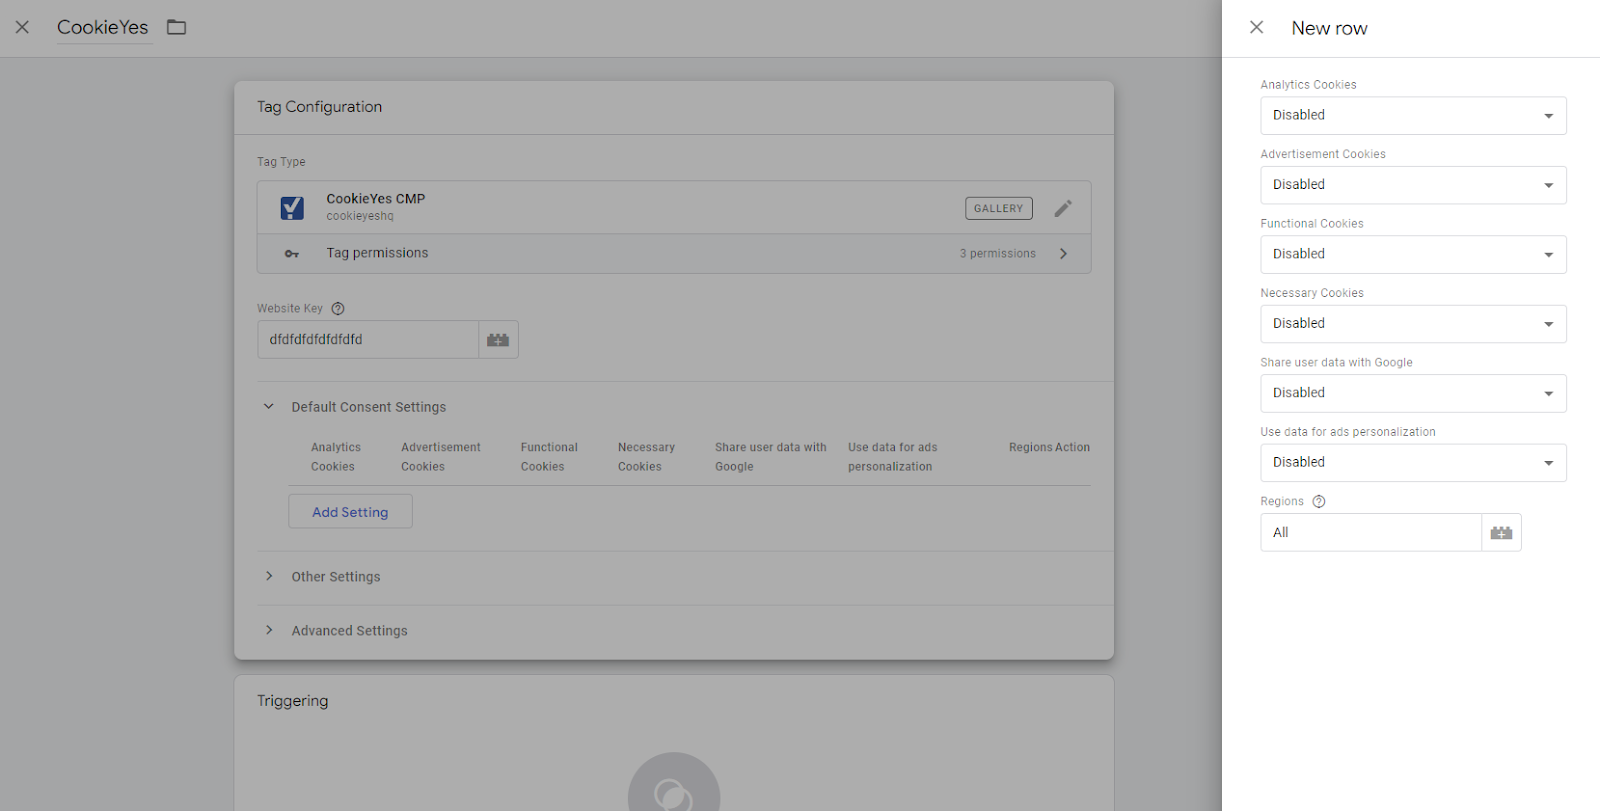
Once that is done, there is one last configuration to do: adding the initial consent states by type of permission. To do this, click on “Default Consent Settings” and then “Add settings.” Set all the values in the right panel to “Disabled,” because permissions should not be granted when a new user lands on your website. Click on “Add.”
Also, if you click on the “Other Settings” section, you will see that, by default, the script will listen for the consent status changes for 2000 ms. This is necessary with this solution because CookieYes takes a bit of time to access the user’s choice when the page loads and update the consent states.
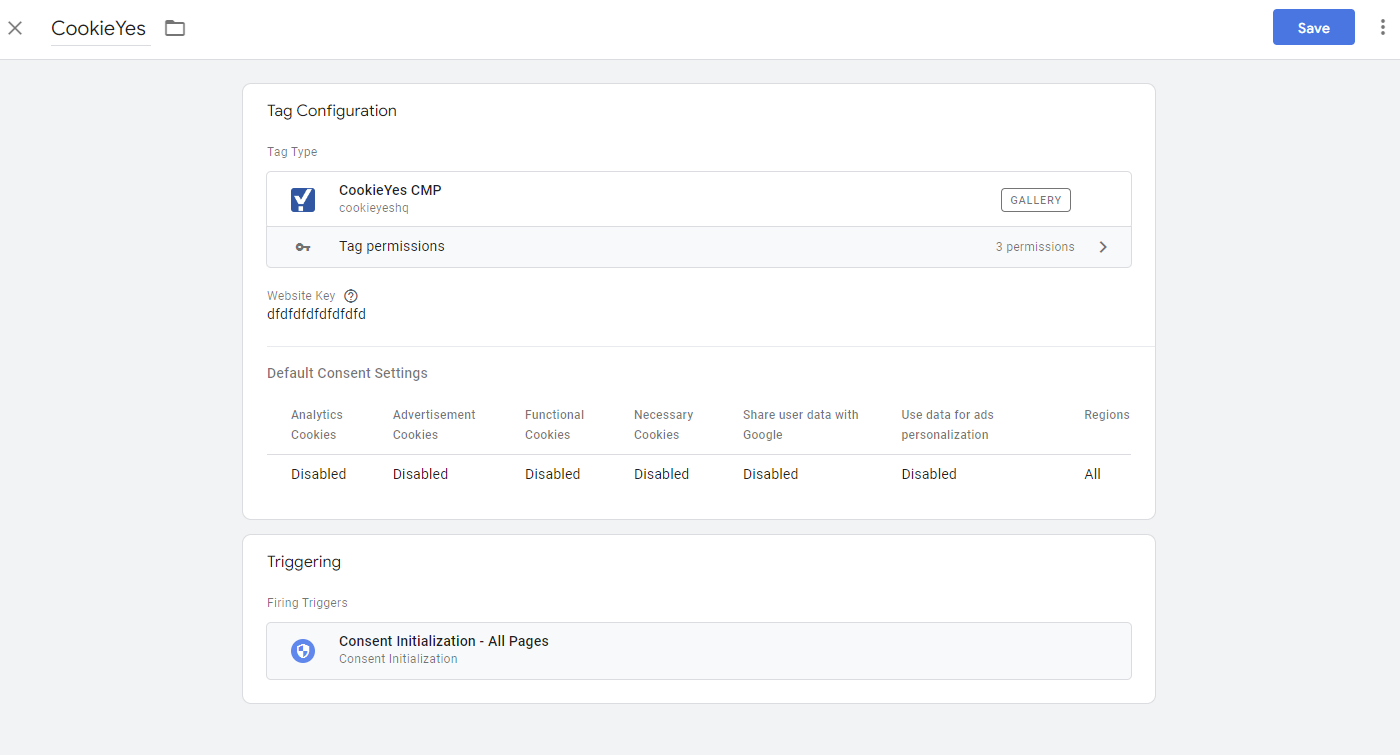
All that remains is to add a trigger. Click on “Triggering” in your tag, then select “Consent Initialization - All Pages.”
The tag is ready!
Customize the banner

Do not publish your changes in GTM just yet. We recommend testing everything before proceeding. However, you can also adjust the appearance of your banner beforehand. In the "Cookie Banner" section of your CookieYes account (make sure to select the correct site at the top if you have multiple ones), you can choose the type of banner to display, change the colors, text, etc.
We recommend customizing this as much as possible to optimize the user experience. Also, don't forget to add a link to your terms of use, which should detail what data you collect, with which solutions, and for what purpose.
Test your setup

Before publishing, test that the configuration works. Click on "Preview" in GTM. A new tab will open. Add the URL of a page on your site and click on "Connect". Another tab should open with your page. On this page, the banner should appear.
If you return to the tab called "Tag Assistant", you will see "consent" events on the left. If you click on the preview tab of your page and accept all the cookies, another event called "cookie_consent_update" should be triggered. Click on this event and go to the "Consent" tab in the center of the screen. You should see that the various permissions are set to "Granted." If you check the values in this tab for the "Consent" events sent earlier, they should be set to "Denied". If this is the case on your end, it works.
CookieYes remembers the user's choice with a cookie and loads it with each page.
Setup your different tags
Now that CookieYes is configured, you need to adjust your tags. If your container only includes tags for Google tools, you don't need to do anything if you want to use the advanced consent mode.
If you want to completely block the loading of tags if no consent has been given, and therefore use the basic consent mode, you need to specify this for each tag (and this is also how you should proceed for tags that are not for Google tools).
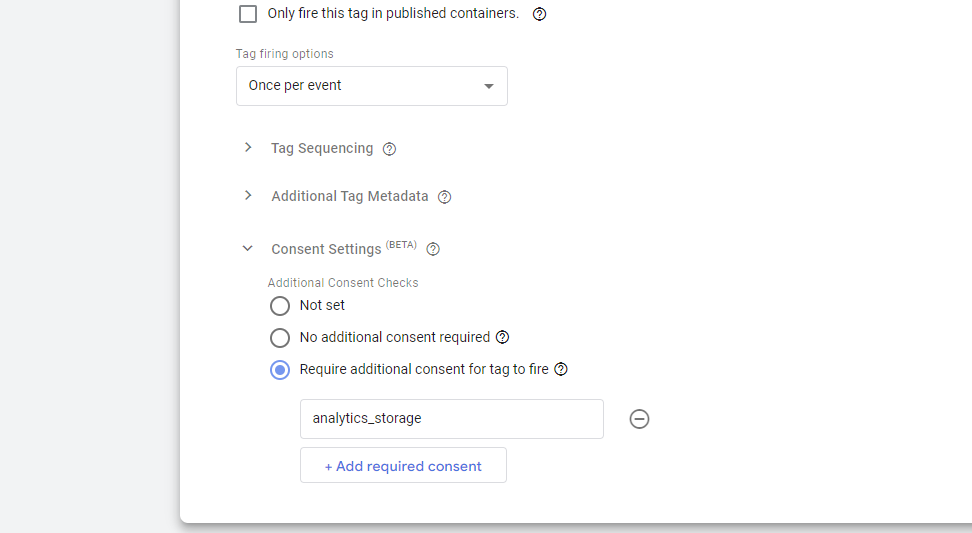
To do this, open each of your tags and click on the configuration section, then advanced settings. In the subsection for consent, choose "Require additional consent for tag to fire." You need to select which permissions are required for the tag to fire (for example, "analytics_storage").
Once you have finished, publish your changes and everything should be effective. Remember to keep an eye on your data within the respective tools to ensure everything is working correctly.
Here is the detailed CookieYes documentation for GTM implementations.
Augustin Delporte
Co-fonder
A former journalist and developer, Augustin has a unique profile. After having spent many years as a Web and SEO redactor, he decided to go and explore the Web technical side to better understand how to optimize websites he works on. He worked at Absolunet, in Montreal before becoming an SEO trainer and consultant. Specialized in e-commerce, we helps customers optimizing their traffic and conversions with SEO and Analytics. Augustin is Google Analytics and Google Ads cetified.

Want more? Here are other articles for you


.jpeg)
.jpeg)
